No Horsing Around!

The following slide show was created in Animoto and then it was embedded in my blog.  Animoto is a really cool tool that you can use to create quick slide shows that automatically add transitions.  You can choose music and other settings as well if you choose.  I thought I would share one of my favorites that I created of the Equestrian Team having fun!  Enjoy the show!

Create your own video slideshow at animoto.com.

Digital Design 7 Self Portraits

Digital Design 7 students created their self portrait in  ArtRage!  We then took these and put them in a photostream in Flickr then embedded it on our blog.  Students in Digital Design 7 are just beginning their individual blogs and learning all about photography.  They will be adding their artwork to their blogs! Watch these students’ blogs blossom and always feel free to leave a comment!  7th grade blogs are located on the right sidebar.

A Picture is Worth a 1000 Words

This week in my teacher challenge I learned that it is important to spice up your post with a picture.   I thought I would try the same idea of posting 1 picture and having my students and online visitors describe the picture in 5 words or less.  I am gathering this data in a Google Form (creating a Google Form was new to me, so I wanted to learn how to do this too).   I used Paint.net to change the size of the image (width = 500 pixels, height = 375 pixels, resolution = 100) then I licensed my picture by uploading it to flickr – for this picture I chose to embed the small size from flickr.  If you do not want your picture licensed then you can directly upload it in your blog post.  In addition, I got some great tips that I wanted to share with my students by Murcha.   My students  also need to follow these guidelines – If you are using pictures of people, do not include their names, and make sure there is more than 3 people in each picture.  Also remember to get their permission 🙂

Quick Tips By Murcha :

  1. Use original images or photos where possible
  2. If using online images, ensure you follow creative commons requirements (Flickr Creative Commons)
  3. Remember images may need to be resized for online use
  4. Make sure the file extension is  jpg or png not bmp. bmp is too large for online use.
  5. A good image size in blogs is 500 pixels wide by 375 pixels high.
  6. Search for online converters or if you use a PC, try downloading irfanview (a personal favourite). This free tool allows many editing functions.

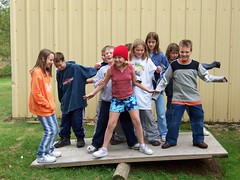
Here is my picture… Can you give it 5 words?

Fill out the survey below the picture then

  Click Here to see what other people have said!

000_0268 (3)

Student Sample – A Walk Through the Park

Digital Design 8 Students – Below is a sample of what your animation of your playground on your blog should include – (1.  Writing, 2. Link to uploaded .avi file, 3.  embedded file linking to Vimeo upload)

My last project in Google Sketchup was to design a park. It could be any kind of park really. I needed to demonstrate that I could download 5 or more component created by others and then build some kind of structure to attach these to. These are the components that I downloaded: (list these here – Ie. Playground by Sketchosaurus, etc…, These are the components that I built: (list these here). I then needed to create an animation in SketchUp and export it as a movie. I hope you enjoy it!

Playground by Sketchosaurus

Sample of SketchUp Project – Just a Walk In the Park from Renee Jorae on Vimeo.

Never Stop Learning!

3717759677_4a520a1dbb_sAs a teacher I am always learning new things!    This past September, my students entered in the Edublog’s Student Blog Challenge however, since I was just learning too and my elementary students only meet with me once a week we are not though all of it yet.  Well, to help me be better at blogging I have now signed up to participate in a Teacher Blog Challenge!  Thus, some of my posts will relate to my class and show what I am doing with my students!  It is my hope that other teachers will help me to become a better blogger thus helping me to become a better teacher! As part of my Teacher Challenge I wanted to show off some of the things that YOU, my students, are doing:

  • 4th grade – created holiday Voki’s then I posted them on a page for all to view. To create your own Voki click here.
  • 5th and 6th grade – creating blog posts and commenting
  • 7th grade Digital Design Class – in the process of creating their own blog and then will be posting their work.  The first project is in ArtRage. To see what ArtRage can do click here and download the DEMO.
  • 8th grade Digital Design Class – created a blog, adding posts, commenting on others, adding their Google SketchUp projects on their blog.  In this course we have awards each week that students can earn.  We encourage people from all over the world to visit our blogs and vote each week and comment on what you see! (look for the award winning blogs in 8th grade – they have an award badge on their page) To try Google Sketch, click here to download the DEMO.

In addition to learning how to blog, I am also learning SketchUp, Scratch, Twitter, Skype, Google Chat, and I got a new Android phone!   I am especially thankful to all of my students who are always challenging me to learn more!  Learning is so much fun!

Photo courtesy of Flickr and Tony Netone